Hydrangea Tutorial – No Special Punch Needed

I love Hydrangeas! And I make them in 1:12, 1:24 and 1:48 scales. This tutorial follows me making them in 1:24 scale but I will notate differences for the other scales.
The zinc buckets are made from thin cardstock and I learned to make them by following these two tutorials by We Love Miniatures on YouTube. Annie’s tutes are great!
To make the buckets: How To Make Miniature Flower Buckets
How to paint: How To Paint Zinc Effect
This is my first tutorial so forgive the newbishness =)
MATERIALS AND TOOLS NEEDED
I live out in the sticks, so I have to make do a lot as it’s a 40 minute drive to anything even resembling a decent store to get materials. Most stuff I buy online as it’s usually cheaper and I can’t justify driving that far when I need only one or two things!
Paper (to make paper clay/mache), white glue, wire, acrylic paint. Coloured paper or I use white paper painted with acrylic paint and dried as I like the texture and can make my own colours/variations.
Pliers, embossing tools, something sharp and pointy to make holes in your balls (ouch!) Some kind of *springy* mat to use when shaping petals and leaves. (I use a piece of foamy/rubbery mousemat) Tweezers.
PREPARING THE FLOWER STEM/HEAD

1:12 – I actually use a dome rather than a full ball for these. I had some plastic dome feet about 12mm diameter, stuck tissue paper over them and painted them white. You could make balls from paper and glue mixture and when very dry just slice them in half. The petals are made with a standard 6mm hole punch.
1:48 – I use 3mm diameter balls and a 1mm hole punch.
Adjust your wire gauge to what you feel comfortable working with. Plastic coated, paper coated or plain painted green.

Adjust your length for 1:12 and 1:48 – the longer they are the easier they are to handle and you can always trim them when arranging

You can use anything that will make a hole – I just LOVE to use my Dremel as often as possible.

MAKING THE PETALS


Tedious? You betcha. I watch movies or catch up on my TV shows while doing this.
ADDING THE PETALS

After your balls on sticks have dried and are firm it’s time to build the flower head. I recommend a tacky glue (all I had at the time was super tacky which is a bit too firm!) Allenes normal tacky would be fine. If you ONLY have normal white glue, pour some out on a plate and let it *air* out a bit – it will become a bit firmer and stop your petals sliding off. The hotter it is in your workspace the more *slidey* your glue will be – I was working in about 38celcius on this day!

1:48 – entirely different. I cover the ball in glue and roll it around in a shallow dish filled with my 1mm punched paper bits. Then go back and fill in any bald bits with a little more glue and place more petals in them with tweezers *ugh*!


MAKING THE LEAVES

I did this by trial and error. Here is a page for you to print out. Hydrangea Leaves (1:24 and 1:48 Scale) Right click the pic and *save as*. Print A4 size should work.


You can also just glue them to the stem with a bit of tacky OR you can even just add them to the bucket/bouquet while arranging.

This is however you want it to be – same colour lighter or darker, a contrasting colour or even a bit of green. Experiment and do what you like the best =)
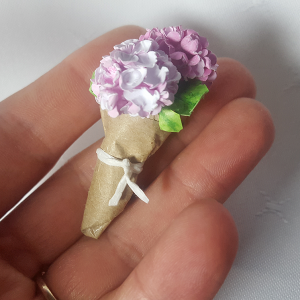
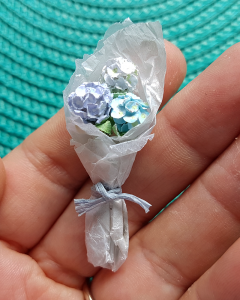
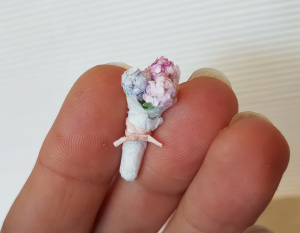
I hope this tutorial is useful to those who want to make hydrangeas but don’t have the funds to buy special punches. The important thing is they are PRETTY =) Feel free to ask me questions, but don’t be offended if I don’t answer promptly – I tend to forget to do things properly 😉
If you want to buy some already made up – take a look in my Etsy shop (shameless plug!)
Yvette – aka Loverat <3)~~

Great tutorial, thank you!
Cheers Julie glad you enjoyed it =)
Nice tutorial honey