My Big Arse Island
My main feature for my kitchen was always going to be as big an island as I could fit, and it also had to have a breakfast bar so I could make some cool industrial bar stools to go under it =)
I built the island out of basswood and birchwood strips (anything I don’t cut by hand automagically looks way more crisp because my cutting still sucks). Of course it had to have storage for my pretend food and whatnot. I decided not to make the doors functional because TIME! SO two sides have cupboards, one with doors I made from an old shutter and the other just plain shaker style. On the third side I built some shelving and tiled the backs with the same tile I used in the Entryway built in. For the counter I took a slab of wood, printed a nice not too busy very light grey and white marble and covered the wood. I added a couple of coats of matte Mod Podge as I wanted the stone to be more like a soapstone than a shiny marble. Ta da! Island achieved.
EDIT: I forgot to point you at the original tutorial for the marble top! I found it at Paperdoll Miniatures and like all the tutorials on their site – it is very awesome =) Make sure you check them all out.

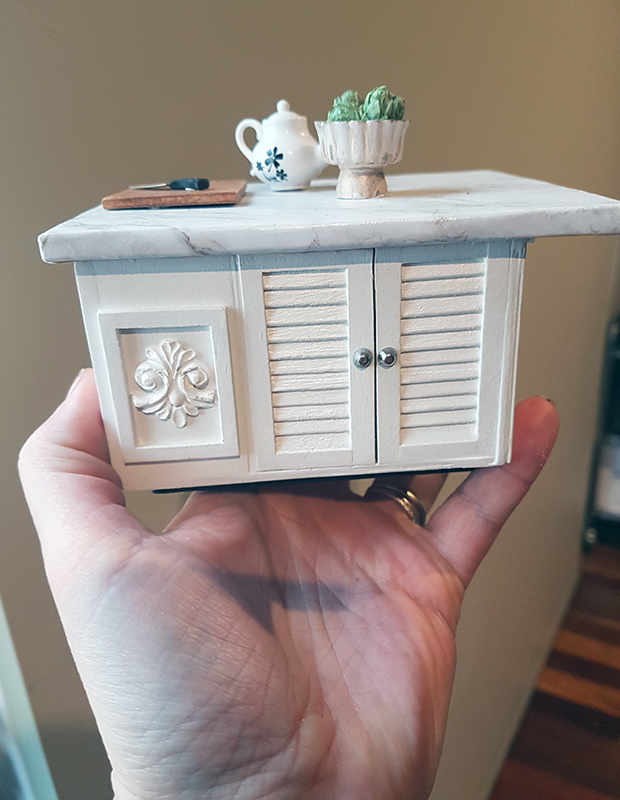


I added some decorative accents (fancy!) and I really like the way it turned out.
Dining Table
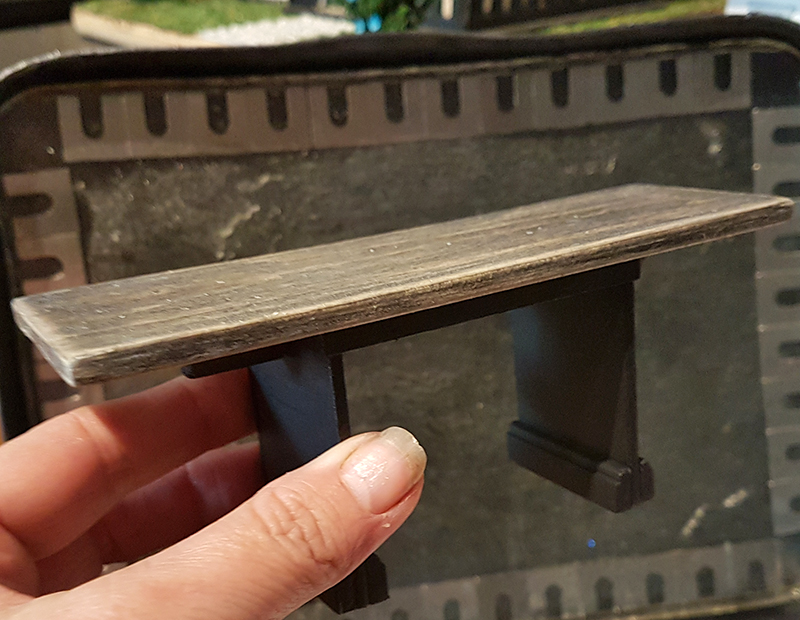
Tables I can handle – tables are easyish. I wanted a reclaimed timber top and a very plain frame so to speak. I made the pedestal style legs from basswood and decorated them a bit with some skirting board I had and painted them black so they kind of blend in with the dark wood floor. Done!
Dining Chairs
And then the pain… I am not at ALL confident with making chairs, as the tiniest bit off with the leg lengths can lead to too much sanding and very short legs! I couldn’t find a tute for the exact chairs I wanted but I did find one that explained the basic elements that I thought I could adapt. The tutorial is by Rea’s Miniature House and can be found here.
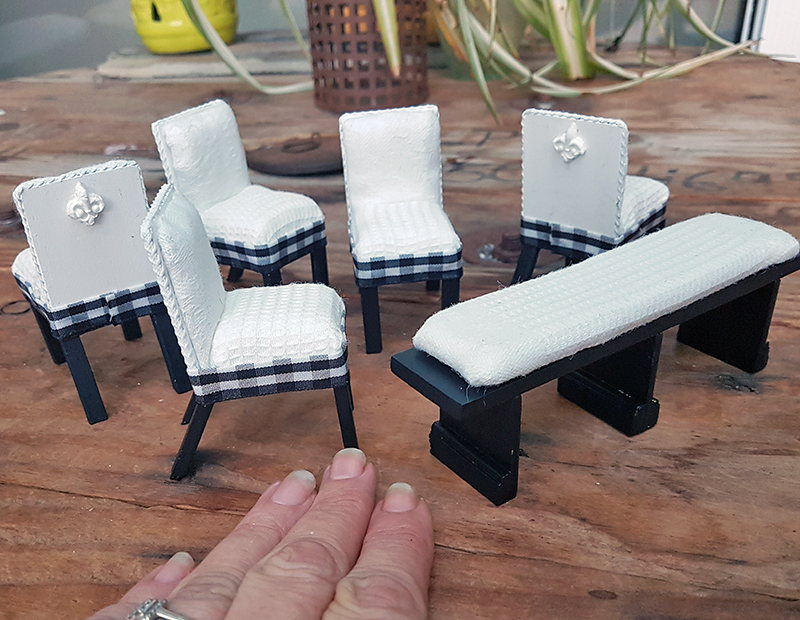
I had an old cushion cover with two distinct “patterns” so I used one pattern for the seat and one for the back. I cut the legs VERY CAREFULLY and managed to actually make them all the same size. I made padded seats and backs. The piping around the edge is some tiny decorative edging I bought from Dragonfly International – Deb sells tiny laces, piping and the like for making doll clothing – this is a highly recommended site! I stuck it on and painted it in the same white chalk paint as the rest of the chair. As with the table I decided to make the legs black and I added a bit of black and white trim around the seat. On the back I added some decorative fleur di lis (spelling???) pieces. For one side of the table I made a bench and added legs made the same way with wood and skirting. Because I am a dirty, dirty girl I spray sealed the lovely white fabric before I could ruin it with dirty fingerprints =)
Bar Stools
I have been wanting to make these forever! My hubby does up vintage cars as a hobby so his garage is like another world full of miniature possibilities for me with all the THINGS in there. I look these things over when he is at work as I would hate to distress him with my person in his beloved garage – haha! The bar stools start with a nut and bolt, some wood disks, wire, cardstock and beads. I am actually doing a tutorial for these stools as it was yay and verrily requested from some darling Instagram followers. The bar stool tops can be rotated up and down which is handy when winging it on leg length. In future I would like to remake these using a soldering iron and some wire that is not so soft (I used that art wire – very soft and easily bendable) I cannot believe what a problem I am having finding decent wire here in Australia.


Your marble topped island is a Knock Out as are your bar stools, which are utterly Amazing!!!!
I love the fact that their height can be adjusted, just like the Real McCoy! Bravo!
And your kitchen table with the reclaimed wood surface and your dining chairs are lovely accomplishments for your beautiful rooms.
Thanks mate! I got the idea from Paperdoll Miniatures and realised I haven’t mentioned that in the post! I read and watch tutes everyday and file them away and wait for them to pop up at the right time and don’t always remember where the idea came from but I was reading her blog today and realised. The brain works slowly sometimes =) I will be doing the tutorial for the stools – it will be handy for non-solderers and involves a lot of superglue. Thanks once again for your lovely words – this has made my day reading all your comments =)